Premiere Pro
This is the program used to assemble all of the footage together and the transitions and some of the effects were added here. With this tool bar i was able to manipulate the footage, cut it down and stretch it for example.

The most commonly used tool i used was the cut tool, every piece of footage i filmed was always much longer than was needed. This was to ensure that i had enough, because if you have to much you can always cut it down but if you don't have enough footage then there is little you can do without effecting the quality of the footage.
As you can see from the picture below the timeline for the video is constructed from all different clips of varying lengths and some of the are different colours at the top, this means that they have had an effect put on them. The effects could be edit transitions, like at the end of the video there is like a montage of the times the characters spend together so i added some of the edits rather than having a simple cut i added fade outs and wash outs to bring a bit of variation to the edits. I added these transitions by going to the effects tool bar at the side and then selecting video transitions and from there picking the effects and dragging it onto the clips i wanted it to effect and i could change when the effect came in and when it ended on the clip.

Premiere Pro is the main place where all of the clips are assembled but not all of the clips have to be put straight on there and effected on premiere pro; this is where the other program i used comes in After effects.
After Effects
After Effects is where i edited all of my green screen footage. It has the facilities that Premiere pro doesn't so i had to use this one. It works on much the same basis but its function is to add effects to footage not to put the footage all together like the Premiere Pro.
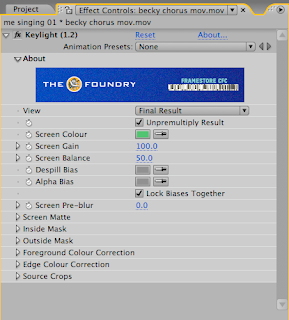
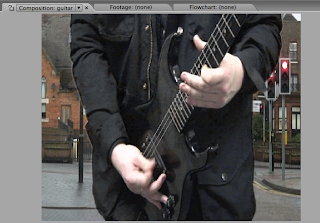
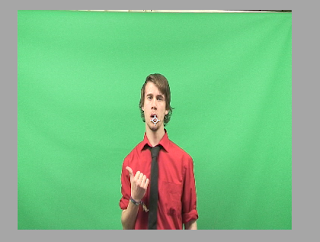
 Here is a picture of the original footage i took from in front of the green screen, we can see Paul playing the guitar in front of the green screen, i need to remove the green and insert the footage of the fast moving cars behind him. So to do this i go to the effects list and select keying then keylight 1.2 and another window pops up where i have to make sure that it know what colour i want it to remove which is green. Once the green is removed i have a cut out or Paul and a empty background ready for me to insert the other footage.

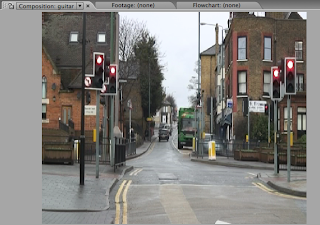
To do this i import the footage of the cars and then drag it down onto the timeline making sure that it is below the the footage of paul playing the guitar on the list so that the footage is shown behind the cut out guitarist footage and as a result providing a background where the green screen used to be. It then looks like this and is ready to be exported ad imported onto Premiere Pro.
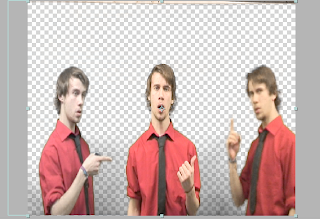

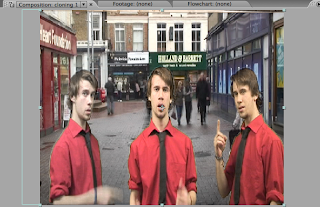

Cloning
Cloning was another effect that i used After Effects to create. Cloning is when there is more than one of the same character one particular place. I used this effect for one specific line in the song "one and one and one is three", as the singer says the line two more of him walk in shot. It gave more emphasis to the line and is something interesting to watch.
The important thing to know when ur cloning is to not have the characters interacting with one another because that would complicate things immensley. If they were to hug or high five or come into contact with one another if not done perfectley then this would look really bad and ruin the illusion u have created with the effect.

So i filmed three different sets of footage infront of the green screen, with me in the different places, one centre screen and then two entering from either side of the screen to say their line. Once this footage was captured it became a matter of using the keylight effect and removing the green screen from each of the clips as i had done before with the guitar sequence and then layering and positioning them on the timeline so that the charaters come in at the correct time.

No comments:
Post a Comment